Mailchimp
Email Verification
Improve your Mailchimp email campaign deliverability and engagement
rates using our superb integration! Bouncer will identify undeliverable
and risky email addresses among your Mailchimp Audience and allow
you to export the clean data back to Mailchimp. Get the best inbox
placement with Bouncer’s help!

We help our subscribers with Mailchimp email verification
With Bouncer, we’ve made the job as easy as possible. You can connect your account to Mailchimp, verify email addresses through our simple and intuitive system, and deliver all cleaned-up data back to your platform..
Clarity
Simply speaking, a valid email address hosted at a domain you can access, prevents all of the unnecessary bounces that come from sending emails to invalid or non-existent addresses.
Saves your time and energy
Make list validation part of your process before each campaign, and you’ll receive far better results, rates and ROI than ever.
Protection
Email verification protects your sender’s score and your reputation. Keeping your lists clean and your sender’s score high, should be essential for everyone in the business..
The power of Bouncer’s Email Verification and Validation API
You can connect your Mailchimp account with Bouncer either by login, or your API Key. If you chose to connect by login, just use your Mailchimp credentials.

The power of Bouncer’s Email Verification and Validation API
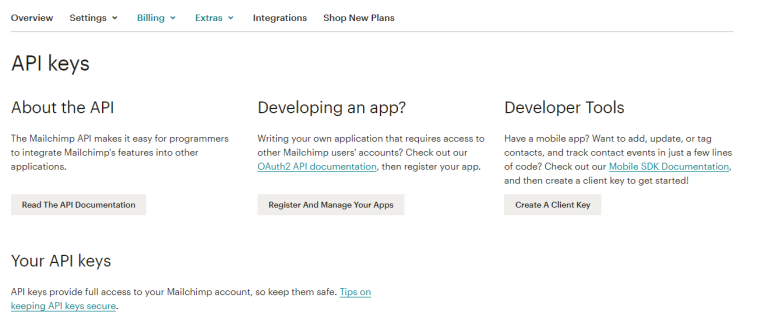
If you would rather connect with your API Key, log in to your Mailchimp account, and click on the search icon, type ‘Account’ and go to Account overview page.
Next, go to EXTRAS tab, and select API keys tab. Once you open the API keys site you will need to create your key, by pressing Create A Key button. This will generate the API key, that you will need to copy in order to integrate your account with Bouncer.
Next, log into your Bouncer account, and go to Verify List tab, click on the tab with our integrations icons, click on the Mailchimp Import button, and paste your API key..
Verifying your Mailchimp list with Bouncer.
Here you will find the instructions on how to connect your Mailchimp account with Bouncer, and how to import your list and export verified emails back to Mailchimp.
Tags
he below tags will be used to reflect the results of Bouncer’s verification:
- bouncer deliverable
- bouncer undeliverable
- bouncer risky
- bouncer unknown
We will also add the below tags to each email address (where applicable), so you will receive some additional information about your subscribers:
- bouncer acceptAll
- bouncer role
- bouncer disposable
Pro-tip #1:
You might want to remove/unsubscribe additional addresses from your list, like disposable, unknown or role – if that’s the case, just simply follow the same steps as for undeliverable emails, just type in the applicable tag.
Pro-tip #2:
You can also create segments with multiple conditionals and prepare your list for the send out, based on your current needs.
All done!
Now you can sit down and relax while watching your undistorted open and click rates increasing


